
If you want to sell your parts better, you can’t ignore the part design. This is the key to taking your parts to the next level. Knurling is one of the important methods, which can not only create unique patterns on the surface of the material, but also provide better grip for the parts. Really make your parts advanced from ‘qualified’ to ‘industrial-grade boutique’.
What is Knurling process?
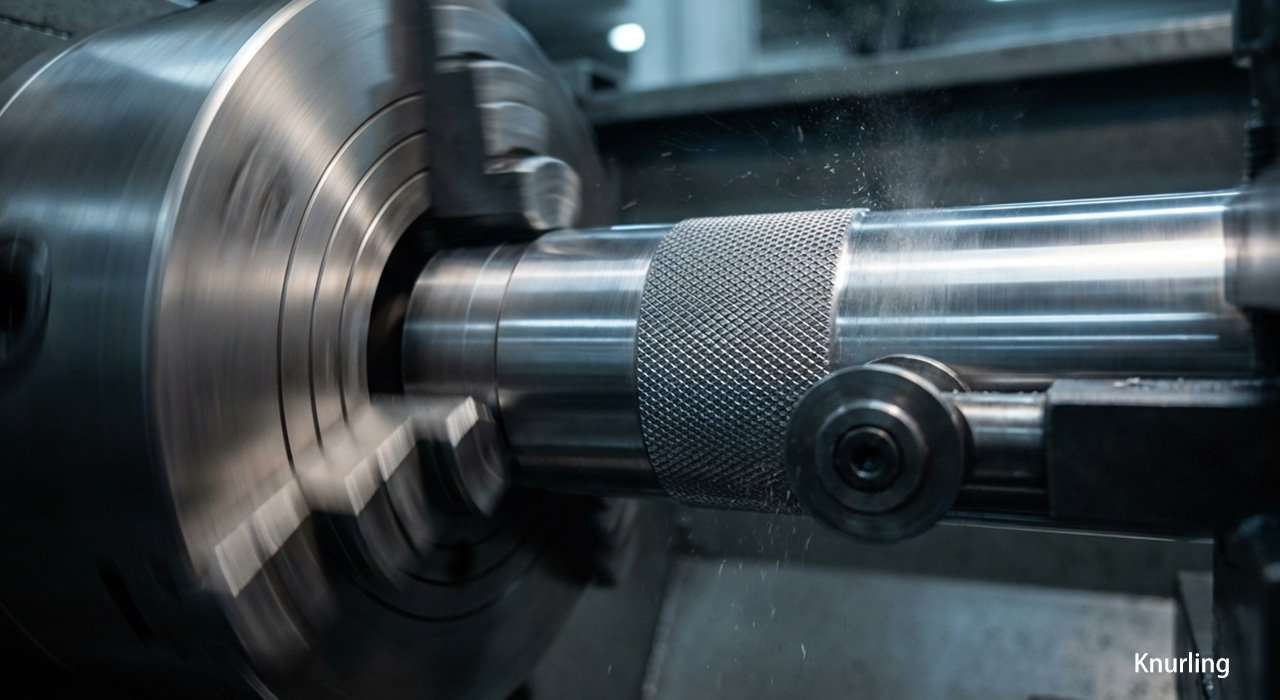
In CNC machining, knurling is a manufacturing process performed on a lathe. This process is to create a pattern with a certain shape and depth on the outer surface of a metal part. The entire manufacturing process usually does not involve cutting off a large amount of material, but using extremely hard knurling wheels to press against the surface of the rotating workpiece, causing plastic deformation (or cutting) of the metal, thereby forming regular protrusions and depressions.
Types of Knurling

Do you want to know what the types of knurling are? Common knurling is mainly classified according to the shape of the pattern and processing technology. The main ones are as follows:
1.By Pattern
(1) Straight Knurling
This pattern is mainly distributed along parallel straight lines, usually arranged along the axial direction of the workpiece, like straight grooves. Straight knurling has a good anti-slip effect and can prevent fingers from slipping when turning the knob. Therefore, it is also generally used for adjustment knobs, pressing pins and other parts that require high friction.
(2) Diagonal Knurling
The pattern is arranged diagonally at a certain angle, usually 30° or 45°, and is mainly divided into two types: left and right. When diagonal knurling is used alone, it is generally for aesthetics or to guide fluid. But if you use the left twill and right twill rollers together, you can process a mesh pattern, which can effectively improve the anti-slip effect.
(3) Diamond Knurling
As the name suggests, the pattern is mainly presented in a diamond shape. The diamond knurling is formed by the cross of the left and right twills, showing countless small pyramid-like bumps (with spires or flat tops). It can provide all-round friction. Diamond knurling has good slip resistance and aesthetics, so it is widely used in various mechanical parts, instrument knobs, nuts, etc.
(4) Special Knurling
Of course, you can also process special patterns such as corrugations, dots, and meshes according to specific requirements for specific functions or unique appearance designs.
2. By Process
(1) Form Knurling
The principle is to use a knurling wheel to press the workpiece, and extrude the metal out of the texture through plastic deformation. However, the consequence of this is that the surface is not sharp enough and prone to burrs.
(2) Cut Knurling
The principle of this process is that the knurling tool, like a turning tool, sharply cuts off excess metal and carves out the texture. The effect is that the texture is extremely clear, sharp and beautiful.
How Knurling Works?

How exactly does knurling work? Presumably, this is a point you are more concerned about, and I will answer it to you in detail next.
1. Preparation Stage
First, you must fix the metal parts on the lathe and ensure that the clamping is firm enough to avoid the problem of shaking parts during processing. In addition, you also need to choose the appropriate processing tool according to the desired pattern.
2. Setting Parameters
Then, it is necessary to adjust the parameters of the lathe, the feed speed and the tool corresponding to the workpiece material and knurling depth requirements so that all work can proceed smoothly for the entire machining period.
3. Machining Stage
Next, comes the formal processing step. Generally speaking, knurling is a typical cold extrusion forming process, rather than metal cutting like a turning tool.
Take the cylindrical shaft we most commonly process as an example. During machining, the knurled wheel feeds radially toward the shaft, applying a lot of pressure. Then the teeth on the knurled wheel squeeze the surface metal of the cylindrical shaft into the groove, and the excess metal flows to both sides and outside. At this time, the surface of the shaft undergoes plastic deformation under high contact stress and is gradually formed into ridges or grooves that match the tooth profile of the knurled wheel. After that, as the knurling wheel rotates around and around, the entire area to be knurled is covered, forming a regular pattern.
4. Post-Processing
Finally, if you have needs, you can also perform subsequent processing such as deburring and cleaning to further improve the surface quality and aesthetics of the parts.
What is Knurling used for?

You may have to ask what is the use of knurling? Don’t worry, I will introduce it to you in detail next.
1. Anti-slip
This is the most common application of knurling. The smooth surface of the part is not easy to operate when it comes into contact with sweat, oil. By adding knurling on the surface of these parts, the friction can be increased significantly, hand slippage can be prevented, and the operation will be safer and more comfortable. Typical examples include thumb screws, various knobs, etc.
2. Beautiful Decoration
This is another impressive application of knurling. It is necessary for you to know that the appearance of knurling is pretty good. It can effectively improve the visual effect of parts. And can also make the product more textured and recognizable. For example: flashlight casing, camera casing, audio knob, etc.
3. Positioning and Assembly
Knurling is often used where interference or press fit is needed. It can be used to position parts or to avoid parts from loosening during assembly. You can also use this feature to create fastening connections between parts. For example, the metal shaft inside the electrical knob, embedded nut, embedded bushing, etc.
4. Improving Bonding Force
In processes such as gluing and cladding, the knurled surface can enhance the bonding force between the bonding material and the metal.
5. Marking Distinction
In fact, there is another use that you may not think of. That is you can also use knurling as a logo. Different knurling patterns can be used as auxiliary marks for batches, models, etc. to facilitate your management and identification.
What materials can be knurled?

1. Metal
- Stainless Steel: The most common knurling material, with high strength and clear patterns
- Aluminum: Softer and easier to knurl
- Copper: Beautiful surface, very suitable for knurling processing
- Brass: Moderate hardness, can form clear and detailed patterns
- Other metals: Some special-purpose parts will also be knurled
2. Plastic
Plastic is soft and easy to deform, so it is very suitable for knurling. Our common plastics that can be knurled include ABS, nylon, polyoxymethylene (POM), polycarbonate (PC), etc.
3. Wood
In terms of wood, there are also many wooden tools that use knurling to increase their friction and aesthetics.
What Machine is used for Knurling?

Needless to say, knurling is usually done on a lathe. After all, the surface of the part requires a lot of external force to form the corresponding knurled shape. As for what are these? That’s what we’re going to talk about next.
1. Engine Lathe
The first machine you need to understand is Engine Lathe, which uses the most traditional processing method. The machine tool requires the operator to have a certain amount of experience, manually control the feed of the tool holder, and apply pressure to the surface of the part by feel. The biggest advantage of this machine tool is that it is easy to set up, and people can feel the resistance of cutting/extrusion in real time, and it is also easy to operate.
2. CNC Lathe
In the modern machining industry, CNC machine tools can be said to be standard equipment. It supports mass production of knurled parts and can also complete precision requirements well. You can write a program and use G code to control the feed time, position and axial feed length. The result is that all parts are consistent in size and grain length.
3. Swiss-style Lathe
High-precision lathe specially designed for machining long and slender parts. Its working principle is that the workpiece moves within the guide sleeve, and the tool is processed very close to the guide sleeve. Its main feature is high production efficiency and it is suitable for making a large number of small knurled parts.
4. Knurl Embossing Machine
Of course, there are also small equipment specially used for making knurling, including machines specially used for continuous knurling of pipes and rods, etc.
Cut Knurling vs. Form Knurling

I believe this is a topic of interest to you. I have described how each of the two processes are done, and now I will show you their differences in the rest of the comparison.
1. Material Displacement vs. Material Removal
In fact, the core difference between the two is that form knurling is a plastic deformation process, and no chips are generated during the process. Cut Knurling is a cutting process, so there will be fine chips produced.
2. Radial Force & Load
This is also a machine tool issue that many of you are concerned about, am I right? Extrusion knurling needs a huge amount of radial force to push the metal to flow, but this force is directly transmitted to the spindle bearing and screw, deforming the part and even affecting the machine tool’s accuracy.
On the other hand, cutting knurling uses a sharp blade to cut into the material with very little radial cutting force. So you can roll deep lines on shafts with very small diameters without the parts being bent.
3. OD Growth
For engineers, OD Growth is key to process scheduling and drawing design. In extrusion knurling, because the material is extruded and raised, the outer diameter after knurling will be significantly larger than the blank diameter. And to solve this problem, you must pre-turn a small blank diameter. Generally, the increase in diameter is about 0.5 times the pitch (Pitch), but this coefficient is greatly affected by the ductility of the material and is difficult to predict accurately, often requiring a test tool.
As for cutting knurling, the outer diameter remains unchanged in theory. In fact, due to the slight extrusion effect, the outer diameter will increase slightly, but it is basically negligible. So, if you need a knurled diameter of 10mm, you turn the stock to 10mm
4. Surface Finish
The extruded knurled surface creates a cold work-hardened layer, which increases hardness and enhances wear resistance. The cutting knurled tooth tips are extremely sharp and perfect, but there may be very subtle milling lines on the sides. The overall look is classier and crisper.
5. Material Suitability
Extrusion knurling is more selective of materials, only suitable for materials with good ductility, such as aluminum, brass, mild steel, 303 stainless steel, etc., cutting knurling does not have such a problem, almost all materials can be processed.
Shorthand comparison table
| Question / Aspect | Better for Form Knurling (Form / Displacement) | Better for Cut Knurling (Cut Type) |
| Material | Low-carbon steel, aluminum, brass, other soft–medium metals | Hard steels, stainless steel, workhardening materials |
| Workpiece rigidity | Short, rigid parts | Long, slender shafts; parts with poor rigidity |
| Dimensional / pattern accuracy | General requirements | High accuracy required |
| Appearance & tactile feel | Regular anti-slip is enough | Premium look & feel, fine and uniform texture |
| Machine capability | Conventional engine lathe | High-precision CNC lathes show clear advantages |
| Cost / complexity | Simple setup, low tooling cost | More expensive tools, more complex setup & programming |
| Tooling Cost | Low, long tool life | High, delicate inserts |
| Setup Complexity | Simple (Center alignment mostly) | Complex (Requires precise angle & height adj.) |
| Material Suitability | Ductile materials only (Alu, Brass, Mild Steel) | Universal (Cast Iron, Plastic, Titanium) |
Precise Calculation of Blank Diameter

This must be your pain point too. Even though the diameter is calculated according to the formula, the split pattern still appears after one cut. In fact, what I want to say is that the formulas in the textbook are only theoretical values, and you should still pay attention to the correction coefficient in your real work.
First of all, knurling is not cutting, but rather gear engagement. After the knurling wheel returns to the starting point from the first turn, if the tip of the tooth does not fall accurately in the groove pressed out of the first turn but lands in another position, then the original grain will be crushed, forming a fine and messy reticulation, which is called split pattern.
In order to avoid such random grains, there must be a mathematical condition: the circumference of the blank is an integer multiple of the pitch of the knurling wheel.
$$ \pi \times D = N \times P $$
(D=diameter, N=integer number of teeth, P=pitch)
The question is: for extrusion knurling, what diameter does this $D$ refer to? What is the initial blank diameter? Or the final diameter after rolling? None.
1. Effective Rolling Diameter
In fact, many newcomers even use the outer diameter of the billet directly to calculate the circumference. But the real location is about 1/3 to 1/2 of the height of the knurled tooth (material hardness dependent). In other words, the diameter you use for the calculation is a little smaller than the diameter of the billet.
2. “Correction Formula”
To ensure that $N$ (the number of teeth) is an integer, you need to work backwards on the blank diameter.
General empirical formula (for 90° texture):
$$ D_{blank} = D_{final} – P $$
Formula definition:
$$D_{blank}$$
Blank diameter after turning
$$D_{final}$$
The final knurling diameter required by the drawing
$$P$$
Knurl pitch (Pitch)
More precise derivation logic:
- Determine the target number of teeth N:
$$ N = \frac{D_{final} \times \pi}{P} $$
(The result is usually a decimal, e.g. 32.6)
- Round N: Round to an integer (for example, 33)
- Back-calculate the ideal blank diameter:
$$ D_{blank} = \frac{N \times P}{\pi} – K $$
(K is a correction coefficient, usually 0.1mm ~ 0.25mm, used to compensate for the diameter growth during extrusion)
Practical Job Tips: The Taper Method
Can’t understand? It doesn’t matter, now I’ll explain it to you while doing it.
1. Operating Procedures
First, during the debugging stage, you should not turn the test rod into a cylinder, but into a long, shallow taper. The taper range covers $\pm 0.1mm$ of $D_{blank}$ calculated by the formula.
2. Rolling Test
Next, you need to make a pass with the knurling knife across the entire cone surface.
3. Observing and Establishing Diameter
At this time, you will find through observation that some places on the cone surface have clear lines (perfect mesh), and some places have chaotic lines. All you have to do is find the section with the clearest texture and measure the diameter there. This diameter is the perfect blank diameter for this machine tool, this material, and this tool.
Finally, I am attaching the rule of thumb, hoping it will be helpful to you too.
| Knurl Pitch (P) | Teeth Per Inch (TPI) | Approx. Diameter Reduction |
| 0.5 mm | ~50 TPI | – 0.20 mm |
| 0.8 mm | ~32 TPI | – 0.35 mm |
| 1.0 mm | ~25 TPI | – 0.45 mm |
| 1.2 mm | ~21 TPI | – 0.55 mm |
| 1.5 mm | ~17 TPI | – 0.65 mm |
(Note: This table is suitable for extrusion knurling and is for reference only. Actual fine-tuning is required)
In Conclusion
Okay, that’s all the introduction to knurling. I believe you will gain a lot from reading the entire article. It can be said that it is precisely because of the appearance of knurling that parts become more beautiful and practical. Of course, if you are worried about the processing of parts at this time, you can also take a look at our CNC machining services. I believe that our professional and excellent processing capabilities can help you share your worries!
FAQ
Q1: Do I need to model the knurl in CAD?
A: Normally you don’t need to model the knurling strips in CAD, but it may be necessary in some special cases, such as product rendering, 3D printing appearance verification, etc.
Q2: Why is knurling important?
A: Knurling is important because it can be applied to the surface of the part while addressing several things: non-slip, safety, secure assembly, feel and appearance. A small process can bring so many advantages.
Q3: How to knurl on a lathe for beginners?
A : The first point for beginners to learn is to select the knurling tool and the material of the workpiece. The second point is to center and clamp the workpiece, and ensure that the workpiece will not move during processing. The third point is to set the speed and feed of the machine tool. The fourth point is that when processing, novices should be careful not to hesitate and be nervous and relax. When the time is right, the knife should be cut decisively and compacted at one time. The last point is that after stopping the machine, you need to check the pattern and size of the parts to see if there are any random or double-grain problems on the surface.
Q4: What is the best knurl pattern to use?
A: Diamond Knurl is generally the most versatile and most widely used product for most customers. After all, no matter how you hold it, the anti-slip effect is very good. But if you need to manually rotate frequently and require smoothness, straight knurling is a good choice, so it is easier for you to twist in a certain direction.
Q5: What are the disadvantages of knurling?
A : When it comes to the disadvantages of knurling, the first point is that it is a high-load additional process, which will exert a large radial force on the workpiece and the machine tool, which can easily cause the parts to bend and cause wear to the machine tool. The second point is that knurling will damage or change the size and surface quality. The third point is that the knurled surface is not conducive to cleaning and anti-corrosion, and the grooves are prone to accumulation of oil and dirt.
Q6: What speed do you need to knurl on a lathe?
A: For ordinary manual lathes or CNC lathes, you can control the knurling speed in the range of about 50 to 200 r/min. You should know that the larger the diameter and the harder the material, the lower the rotation speed (for example, a large diameter carbon steel shaft, 50 to 100 r/min is more suitable); for small diameter and soft materials (aluminum, brass), the rotation speed can be appropriately higher (100 to 200 r/min), but there is no need to pursue high rotation speed.
Q7: Does knurling increase friction?
A: Yes, one of the core functions of knurling is to significantly increase friction. It improves bite through geometry.


